Recent Posts
Why Water Damage in Older Homes Demands Special Attention
10/21/2023 (Permalink)
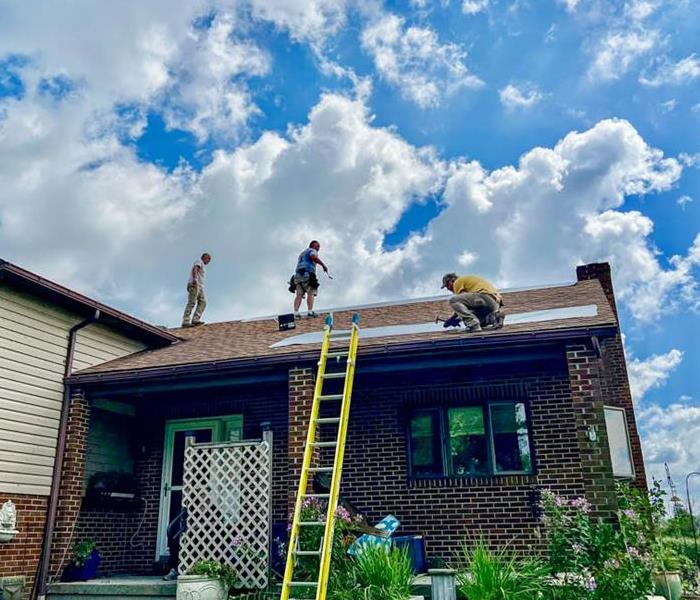 Regularly inspect and maintain the home's exterior, including roofs, gutters, and downspouts to prevent water damage!
Historical or older homes carry a unique charm and character, but they also come with their own set of challenges when it comes to water damage. With aging infrastructure and sometimes delicate materials, these properties require special considerations when addressing water damage to preserve their historical value. In this blog post, we will explore some important factors to keep in mind when dealing with water damage in historical or older homes.
Understanding the Structure
Historical homes often feature materials and construction methods that are no longer commonly used. Understand the age of your home and the vulnerabilities of its specific architectural elements, such as wooden beams, plaster walls, or stone foundations. This knowledge will help you assess potential water damage risks more accurately.
Regular inspections can help identify maintenance issues or signs of water intrusion early on. Pay attention to areas prone to leaks, such as roofs, windows, and basements. Look for signs of water stains, rot, or mold growth on surfaces.
Addressing Water Damage
When it comes to water damage in historical homes, it is advisable to consult professionals experienced in working with older properties. These experts will have the knowledge and expertise to understand the unique challenges involved and provide appropriate solutions.
Preserving the historic integrity of the property is crucial. Whenever possible, salvage and restore original materials, such as flooring, molding, or architectural features. Properly drying and treating these materials can help prevent further damage and maintain the authenticity of the home.
Create a restoration plan that addresses both the water damage and any subsequent repairs or renovations that may be necessary. Ensure that the plan adheres to local preservation guidelines and regulations to protect the historical significance of the home.
Protective Measures
Take proactive steps to prevent water damage in the first place. Regularly inspect and maintain the home's exterior, including roofs, gutters, and downspouts. Install appropriate weatherproofing measures, such as sealants and moisture barriers.
Depending on the age and condition of the home, consider implementing or updating drainage systems to redirect water away from the foundation. This can help prevent water infiltration and reduce the risk of basement flooding or structural damage. Controlling indoor humidity levels helps prevent excess moisture, which can lead to mold growth and deterioration of historical materials. Use dehumidifiers and proper ventilation systems to maintain a healthy moisture balance in the home.
By being mindful of the unique considerations surrounding water damage in historical or older homes, you can effectively protect these valuable properties from further harm. Working with professionals experienced in restoring and preserving historical structures ensures that the necessary repairs are done with the utmost care, maintaining the integrity and charm of these timeless homes for generations to come.
Ice Dam Prevention and Remediation: Essential Tips
9/10/2023 (Permalink)
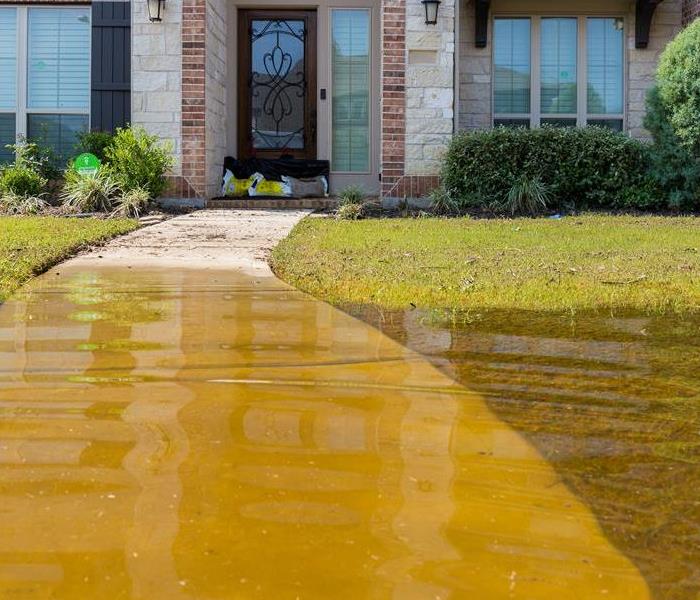
 Proper remediation of water can help prevent damage to your home or business.
Ice dams are a common problem in Northeastern regions during the winter season. They occur when heat from the attic rises and melts snow on the roof, which then refreezes near the edge of the roof, causing a dam that blocks the flow of water. This can lead to water damage to the interior of the home and roof. In this blog post, we will explore essential tips for Northeast ice dam prevention and remediation.
Insulate and Ventilate the Attic
One of the most effective ways to prevent ice dams is to ensure proper insulation and ventilation in the attic. Insulation helps reduce heat transfer from the living space to the attic, while proper ventilation allows for the release of any heat and moisture that may build up in the attic. This balance can help maintain the temperature of the roof deck and reduce the risk of melting and refreezing of snow on the roof surface.
Seal Air Leaks
Air leaks between the attic and living space can allow warm air to enter the attic, leading to the formation of ice dams. Sealing these leaks can help reduce the transfer of heat to the attic and prevent ice dam formation. Common areas for air leaks include attic hatches, electrical outlets, and around pipes and ductwork. Sealing these areas with caulking or weatherstripping can help improve energy efficiency and prevent ice dams.
Remove Snow from the Roof
Removing snow from the roof can help prevent ice dams from forming. Using a roof rake or other tool to remove snow from the roof surface can reduce the risk of snow melting and refreezing near the edge of the roof. However, exercise caution when working on a roof surface and consider hiring a professional if you are not comfortable doing it yourself.
Use Heat Tape
Heat tape can be installed along the edge of the roof to melt snow and prevent the formation of ice dams. This can be especially useful in areas where ice dams are common, but it is important to use caution when installing heat tape and follow manufacturer guidelines to ensure proper installation and safety.
Address Ice Dam Remediation Quickly
If an ice dam has already formed, it is crucial to address it quickly to prevent further water damage to the interior of the home. Using a roof rake or other tool to remove snow and ice from the roof surface can help prevent further buildup, while using a safe ice-melting product can help break up the ice dam. Additionally, hiring a professional to address the ice dam and assess any damage to the roof or interior of the home may be necessary.
Ice dams can cause significant damage to Northeastern homes and require attention to prevent and remediate. Proper insulation and ventilation, sealing air leaks, removing snow from the roof surface, using heat tape, and addressing ice dam remediation quickly are all essential tips to prevent and mitigate the damage caused by ice dams. By taking proactive measures to prevent and address ice dams, Northeastern homeowners can protect their homes and ensure a safe and comfortable winter season.
Avoiding Common Pitfalls: Mistakes to Steer Clear of When Making a Fire Claim
8/14/2023 (Permalink)
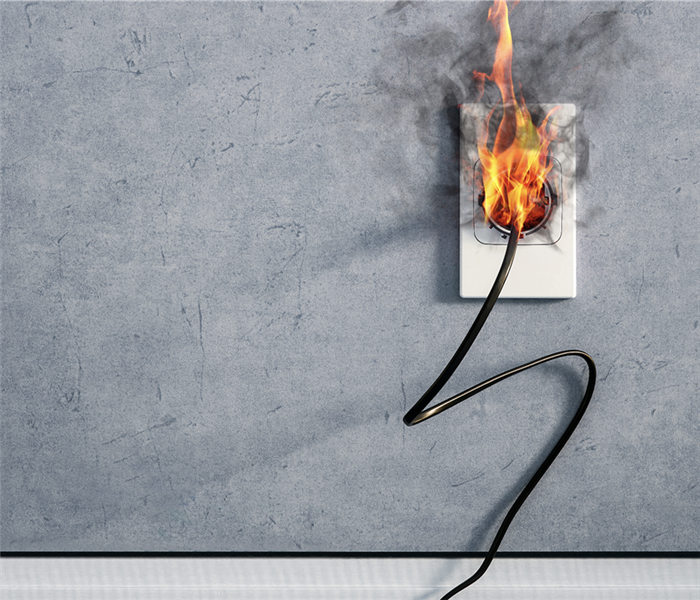 Filing a fire insurance claim can be a complex and overwhelming process.
Filing a fire insurance claim can be a complex and overwhelming process, especially in the aftermath of a devastating event. To ensure a smooth and successful claim experience, it's crucial to avoid common pitfalls that could potentially jeopardize your claim. In this article, we will discuss the most common mistakes homeowners should steer clear of when making a fire claim and provide helpful tips to navigate the process effectively.
Delaying the Notification
One of the most significant mistakes homeowners make is delaying the notification of their insurance company. It's crucial to promptly report the fire incident and initiate the claims process. Contact your insurance provider as soon as possible to ensure a timely response and documentation of the damages.
Failing to Review the Insurance Policy
Before making a fire claim, thoroughly review your insurance policy to understand the coverage, limitations, deductibles, and any specific requirements for filing a claim. Being aware of the policy details will help you set realistic expectations and prevent misunderstandings during the claims process.
Neglecting Proper Documentation
Insufficient or incomplete documentation is a common pitfall. Take detailed photographs or videos of the fire damage, including the affected areas, personal belongings, and structural damage. Keep records of any related expenses, receipts, and communication with the insurance company to support your claim.
Discarding Damaged Property Prematurely
Avoid disposing of damaged property or making significant repairs before consulting with your insurance company. They may need to assess the damage firsthand and document the loss. Preserve the damaged property or belongings until the insurance adjuster has an opportunity to evaluate them.
Failing to Mitigate Further Damage
As a responsible homeowner, it's essential to take immediate action to prevent further damage after a fire. Failure to mitigate additional loss (e.g., water damage or vandalism) can result in complications during the claim process. Take necessary steps to secure the property and address immediate repair needs.
Not Seeking Professional Assistance
Navigating the complexities of a fire insurance claim can be overwhelming. Engaging a public adjuster or fire damage restoration professional can provide valuable expertise and support throughout the process. They can help assess the damage, document the loss, and negotiate with the insurance company on your behalf.
Miscommunication with the Insurance Company
Clear and consistent communication with your insurance company is vital. Be honest and accurate when providing information about the incident and the damages. Keep records of all conversations, including dates, times, and the names of the individuals you spoke with.
Settling for an Inadequate Settlement
Avoid accepting an initial settlement offer without carefully evaluating its fairness and adequacy. Review the proposed settlement in light of your policy coverage, the extent of the damages, and any additional expenses you may incur during the recovery process. Consult with professionals or seek legal advice if necessary.
Overlooking Additional Living Expenses
If your home is temporarily uninhabitable due to fire damage, you may be eligible for coverage of additional living expenses. This can include costs for temporary accommodation, meals, and other necessary expenses. Keep track of these expenses and ensure they are included in your claim.
Missing Deadlines
Insurance policies typically have specific deadlines for filing a claim or providing supporting documentation. Missing these deadlines can lead to claim denial or delays. Stay organized, understand the timeline, and adhere to the specified requirements to ensure your claim is processed smoothly.
Making a fire insurance claim can be a challenging process, but by avoiding common pitfalls, you can improve your chances of a successful outcome. Promptly report the incident, thoroughly document the damage, and communicate effectively with your insurance company. Seek professional guidance when needed, review your policy carefully, and be proactive in meeting deadlines. By avoiding these common mistakes, you can navigate the fire claim process with greater confidence and maximize your chances of receiving fair compensation to aid in your recovery.
A Step-by-Step Guide: Making a Water Damage Claim to Your Insurance Company
7/18/2023 (Permalink)
Experiencing water damage in your home or business can be a stressful and overwhelming situation. Fortunately, having a comprehensive insurance policy in place can help alleviate some of the financial burdens associated with water damage restoration. In this blog, we will guide you through the process of making a water damage claim to your insurance company after a loss, ensuring a smooth and successful claims process.
Act Promptly
As soon as you discover water damage, it's crucial to take immediate action. Document the damage by taking photographs or videos to provide visual evidence of the incident. This step is essential for supporting your insurance claim.
Review Your Insurance Policy
Familiarize yourself with your insurance policy and understand the coverage it provides for water damage. Pay attention to specific inclusions and exclusions, deductible amounts, and any limitations or requirements for filing a claim.
Contact Your Insurance Company
Notify your insurance company about the water damage incident as soon as possible. Provide them with accurate and detailed information about the cause of the damage, the extent of the damage, and any temporary measures you've taken to prevent further loss.
Follow Documentation Requirements
Your insurance company will likely require specific documentation to support your claim. Keep records of all communication with your insurer, including claim numbers, names of representatives, and dates of contact. Compile a detailed inventory of damaged items, including their estimated value, purchase dates, and receipts, if available.
Mitigate Further Damage
Take immediate steps to mitigate further damage to your property. This could include temporarily repairing leaks, drying out affected areas, or boarding up damaged windows or doors. However, be sure to consult with your insurance company before initiating any major repairs.
Obtain Professional Assessments and Estimates
Contact a reputable water damage restoration company to conduct a thorough assessment of the damage. Their expertise and documentation will support your insurance claim. Request itemized estimates for the necessary repairs and restoration work to submit to your insurer.
Work with an Adjuster
Your insurance company may assign an adjuster to evaluate the damage and determine the claim's value. Be prepared to provide them with all necessary documentation, including the assessments and estimates from the restoration company. Cooperate with the adjuster and address any questions or concerns they may have.
Understand the Claims Process
Familiarize yourself with the claims process specific to your insurance company. This will help you understand the timeline for claim resolution, any required forms or paperwork, and the steps involved in receiving your settlement.
Keep Detailed Records
Throughout the claims process, maintain thorough records of all communications, documents, and expenses related to your water damage claim. This will help you stay organized and provide evidence if any discrepancies arise.
Making a water damage claim to your insurance company requires prompt action, proper documentation, and effective communication. By following the steps outlined in this guide, you can navigate the claims process with confidence and increase the likelihood of a successful claim. Remember, it's crucial to consult with professionals, such as a reputable water damage restoration company, to ensure accurate assessments and estimates.
In the event of water damage, SERVPRO of Indiana County is here to assist you every step of the way. Our experienced team understands the complexities of water damage claims and can provide the necessary documentation and support to maximize your claim's potential. Contact us today for reliable water damage restoration services and expert assistance with your insurance claim.
6 Essential Tips for Maintaining Your Sump Pump and Preventing Water Damage
6/13/2023 (Permalink)
 A Sump pump is crucial to have to help protect your building from water damage.
A sump pump is an essential piece of equipment for any building with a basement or crawl space. Its primary function is to prevent flooding and water damage by pumping excess water out of the area. However, like any piece of equipment, a sump pump requires regular maintenance to ensure that it continues to function properly. In this blog, we'll explore some tips on how to maintain a sump pump.
Check the Power Source
Before performing any maintenance on your sump pump, make sure it's disconnected from the power source. Unplug it or turn off the circuit breaker that controls the sump pump to prevent any accidents. It's also a good idea to test the outlet and ensure that it's functioning correctly.
Inspect the Sump Pump Basin
The sump pump basin is the area where the sump pump sits, and it's important to inspect it regularly to ensure that it's free of debris and functioning correctly. Remove any dirt, gravel, or debris from the basin and make sure the pump is sitting level. Check the float switch to ensure that it's moving freely and not stuck in the on or off position.
Check the Pump
The pump itself is the heart of the sump pump system, and it's essential to ensure that it's functioning correctly. Inspect the pump for any signs of damage or wear, such as rust or cracks. Check the impeller, which is the fan-like part of the pump that moves the water, for any debris that may be blocking it. Clean the impeller if necessary, and make sure it's moving freely.
Test the Pump
Testing your sump pump is an important part of maintenance. Pour a bucket of water into the sump pump basin to trigger the pump and make sure it's working correctly. Listen for any unusual noises or vibrations, and ensure that the pump is moving the water out of the basin and away from your building.
Check the Discharge Line
The discharge line is the pipe that carries water away from your building, and it's essential to ensure that it's free of obstructions and functioning correctly. Inspect the discharge line for any cracks, clogs, or damage, and clear any obstructions if necessary. Make sure the discharge line is securely attached to the pump and the discharge point.
Schedule Regular Maintenance
Finally, scheduling regular maintenance for your sump pump can help prevent problems and ensure that it continues to function correctly. Consider scheduling a professional inspection and maintenance service once a year to clean and inspect your sump pump thoroughly.
In conclusion, a sump pump is a crucial piece of equipment that requires regular maintenance to ensure that it continues to function correctly. By following the tips above, you can help prevent problems and keep your sump pump running smoothly. Remember to check the power source, inspect the sump pump basin, pump, and discharge line, test the pump, and schedule regular maintenance. With proper maintenance, your sump pump can help protect your building from water damage and flooding.
Understanding Homeowners Insurance Coverage for Mold Damage: What You Need to Know
5/15/2023 (Permalink)
 Whether or not your homeowner's insurance policy covers mold damage will depend on several factors.
As a homeowner, you may be wondering whether your homeowner's insurance policy covers mold damage. Mold growth in homes is a common problem, and it can cause significant damage to your property if left unchecked. However, whether or not your insurance policy covers mold damage will depend on several factors.
Understanding Mold Damage
Mold is a type of fungus that thrives in warm, damp environments. It can grow on a variety of surfaces, including walls, ceilings, floors, and even furniture. Mold can cause serious damage to your home if left untreated, including structural damage, unsightly stains, and unpleasant odors.
Does Homeowners Insurance Cover Mold Damage?
The answer to this question is not straightforward. While some homeowner's insurance policies may cover mold damage, others specifically exclude it from coverage. Additionally, even policies that do cover mold damage may have limitations and conditions that must be met before coverage kicks in.
Types of Homeowners Insurance Coverage
There are three main types of homeowner's insurance coverage: dwelling coverage, personal property coverage, and liability coverage. Each of these types of coverage provides protection for different aspects of your home and property.
Dwelling Coverage and Mold Damage
Dwelling coverage is designed to protect the structure of your home, including walls, roofs, and foundations. Some homeowners' insurance policies may cover mold damage as part of their dwelling coverage, but others may specifically exclude it. It is important to review your policy carefully to determine whether or not mold damage is covered.
Personal Property Coverage and Mold Damage
Personal property coverage is designed to protect your belongings, such as furniture, clothing, and electronics. Some homeowner's insurance policies may cover mold damage to your personal property, but again, it is important to review your policy to determine whether or not this coverage is included.
Liability Coverage and Mold Damage
Liability coverage is designed to protect you in the event that someone is injured on your property or if you cause damage to someone else's property. While liability coverage does not typically cover mold damage specifically, it may provide some protection if the mold is caused by a covered event, such as a burst pipe or a roof leak.
Limitations and Conditions
Even if your homeowner's insurance policy does cover mold damage, there may be limitations and conditions that you need to be aware of. For example, some policies may only cover mold damage up to a certain dollar amount or may require you to take certain actions, such as hiring a professional mold remediation company, in order to be eligible for coverage.
Prevention is Key
The best way to protect your home and property from mold damage is to prevent it from occurring in the first place. This means taking steps to keep your home dry and well-ventilated, fixing any leaks or water damage immediately, and cleaning up any spills or moisture promptly.
In conclusion, whether or not your homeowner's insurance policy covers mold damage will depend on several factors, including the type of coverage you have and the specific terms of your policy. It is important to review your policy carefully and to talk to your insurance provider if you have any questions or concerns. And remember, prevention is always the best defense against mold damage.
7 Essential Steps to Take If Your House is on Fire
4/17/2023 (Permalink)
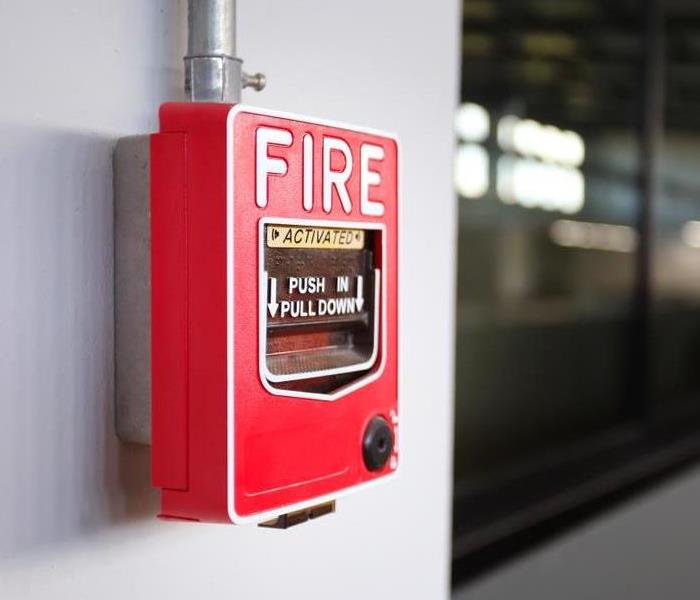 By remaining calm and taking the proper steps, you can ensure the safety of yourself and your loved ones.
A house fire can be a devastating experience for any homeowner. In the event of a fire, it is important to remain calm and take the proper steps to ensure the safety of yourself and your loved ones. Here are the steps to take if your house is on fire:
Step 1: Get Out Immediately
The first and most important step in the event of a house fire is to get out of the house immediately. Do not attempt to grab any belongings or valuables, as these can be replaced. If there are other people in the house, make sure they are aware of the fire and are also evacuating. If possible, use the closest exit to escape the house.
Step 2: Call 911
Once you are safely outside, call 911 immediately. Provide the operator with your name, address, and a brief description of the situation. Stay on the line until the operator tells you it is safe to hang up.
Step 3: Stay Outside
Do not re-enter the house for any reason. Even if the fire appears to be small or contained, it can spread quickly and become dangerous. Wait for the fire department to arrive and handle the situation.
Step 4: Alert Neighbors
If you have neighbors nearby, alert them to the situation and ask if they can offer any assistance. They may be able to provide a place for you to wait while the fire department works to extinguish the fire.
Step 5: Follow Up with Insurance
After the fire has been extinguished and the situation is under control, contact your insurance company to file a claim. Be sure to provide a detailed list of damages and any personal belongings that were lost in the fire.
Step 6: Seek Professional Restoration Services
Once the fire department has given the all-clear to enter your home, it is important to seek professional restoration services. These professionals can help with the cleanup and restoration process, including removing any water damage and smoke damage.
Step 7: Take Preventative Measures
After the fire has been extinguished and your home has been restored, it is important to take preventative measures to reduce the risk of a future fire. This includes installing smoke detectors in every room of your home, having a fire escape plan in place, and ensuring that all electrical wiring and appliances are up to code and properly maintained.
In conclusion, a house fire can be a traumatic experience for any homeowner. However, by remaining calm and taking the proper steps, you can ensure the safety of yourself and your loved ones. Remember to evacuate immediately, call 911, stay outside, alert neighbors, follow up with insurance, seek professional restoration services, and take preventative measures to reduce the risk of a future fire. By taking these steps, you can recover from a house fire and move forward with your life.
How To Find Your Home's Main Water Shutoff Valve
3/12/2023 (Permalink)
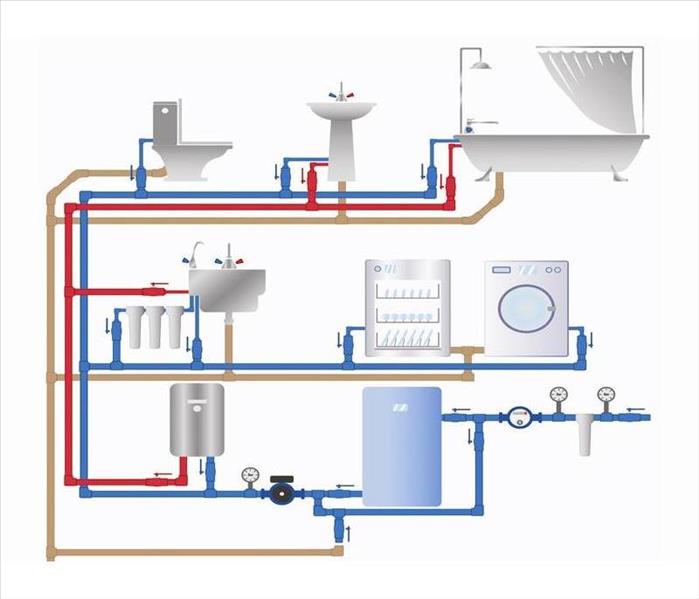 Finding your home's main water shutoff valve is an important step in protecting your property from water damage.
As a homeowner, it's important to know where your home's main water shutoff valve is located. In the event of a water emergency, such as a burst pipe or major leak, shutting off the main water supply can help prevent costly damage to your property. Here's how to find your home's main water shutoff valve.
Locate Your Water Meter
The first step in finding your main water shutoff valve is to locate your water meter. This is typically located outside your home, near the street or sidewalk. It may be inside a meter box or a covered pit.
Check the Area Near Your Water Meter
Once you've located your water meter, check the surrounding area for any visible pipes. Your main water shutoff valve is typically located within a few feet of your water meter, either inside or outside your home. Look for a valve or lever that controls the water flow.
Look for Your Home's Curb Valve
If you can't find your main water shutoff valve near your water meter, it's possible that your home has a curb valve. This valve is typically located near the street, in a box or pit. To access the curb valve, you may need a special tool or key. Contact your local water department to find out more information.
Check Your Home's Inspection Report
If you're still having trouble finding your main water shutoff valve, check your home's inspection report. This report should contain information about the location of your main water shutoff valve. If you can't find your inspection report, contact your home inspector or a local plumber for assistance.
Turn Off Individual Water Valves
If you cannot find your main water shutoff valve, the first thing you should do is turn off individual water valves. These valves are usually located near plumbing fixtures such as sinks, toilets, and water heaters. By turning off these valves, you can isolate the area where the problem is occurring and prevent further damage.
Label Your Valve
Once you've located your main water shutoff valve, it's important to label it so that it's easy to find in an emergency. Use a waterproof marker or label maker to mark the valve with "main water shutoff valve" or "emergency water shutoff." Make sure that all members of your household know where the valve is located and how to shut it off.
In conclusion, finding your home's main water shutoff valve is an important step in protecting your property from water damage. Take the time to locate your valve and label it for easy identification in an emergency. If you're having trouble finding your valve, don't hesitate to give our SERVPRO of Indiana County team a call today! Our team can help shut off the flow of water and clean up the mess that was left behind.
What is an Emergency Ready Plan?
2/12/2023 (Permalink)
 Don't wait until disaster strikes, create your ERP today!
The SERVPRO Emergency Ready Plan is a free service that helps you to prepare for emergencies. The ERP documents all the key information of your commercial business, and it's designed to help the commercial business be prepared for any kind of disaster that might occur.
An Emergency Ready Plan (ERP) is a free service provided by SERVPRO.
The Emergency Ready Plan (ERP) is a free service provided by SERVPRO that provides emergency response services and emergency preparedness services. It's also part of our commitment to helping you prepare your business in case of an emergency.
The plan is designed to help the commercial business to be prepared for any kind of emergency disaster that might occur in your business, minimizing business interruption and downtime as much as possible during an emergency situation.
The ERP prepares your business.
The ERP plan documents all the key information of your commercial business, including priority contact details, property description and location, and insurance information. It will also include vital information about your building, including the floor plans, shut-off valve locations, and priority areas of your property.
The ERP gives you peace of mind.
The Emergency Ready Plan gives you peace of mind knowing that if a disaster happens at any time, SERVPRO will be ready to help you out immediately. The ERP will also provide you with a plan of action to get you back in your building as quickly as possible after a loss.
This plan establishes your local SERVPRO as your go-to mitigation and restoration provider. It also identifies a clear line of command, so both parties know exactly who to communicate with when there is an emergency on your property.
Lastly, the ERP also gives you peace of mind with the insurance claims process. When disaster strikes, SERVPRO will assist you with the entire claims process and collect the documentation needed to ensure you get the proper compensation as quickly as possible.
Why Use the SERVPRO Emergency Ready Plan?
The Emergency Ready Plan is a free tool that allows you to create a comprehensive emergency plan for your business in minutes. It's simple and easy to use, making it the perfect tool for both small businesses and large corporations alike.
- It's a good way to document everything that’s important about your business.
- It's easy to share with other people who are responsible for helping out during an emergency.
- If there’s ever an actual emergency at your property (or even if there isn't), you can use the Emergency Ready Plan as proof that you're prepared for any kind of disaster or emergency situation.
Don't wait until disaster strikes, create your ERP today!
Now is the time to start planning for the next disaster. Don't wait until disaster strikes, create your ERP today! Our SERVPRO team will create an emergency ready plan tailored to your business. Your plan will minimize secondary damage and costs and will help you get back into business as quickly as possible, with one phone call to SERVPRO of Indiana County.
We hope that you are now better informed on what the Emergency Ready Plan is and how it can help your business. If you have any questions or would like more information about this free service, please contact us today!
How To Recognize Mold
1/20/2023 (Permalink)
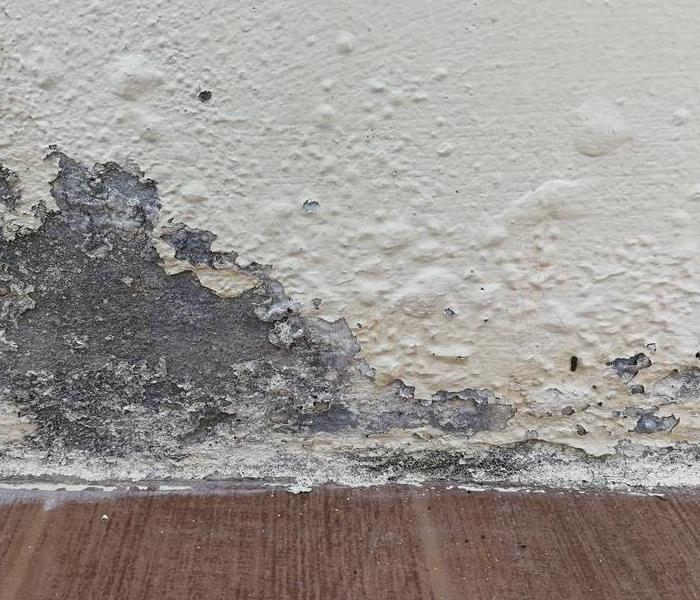 Now that you know what mold looks like, it’s time to take action.
How To Recognize Mold
Mold is a fungus. It's everywhere, and mold infestations are also very common. Most homeowners have experienced a bit of mold at one point or another, but that doesn't mean you should ignore it. Mold is one of the most common indoor air pollutants. Mold grows best in warm and humid environments, such as bathrooms or basements. You may see mold growing on walls, tiles, and even your personal belongings. If you have reason to suspect that your house has mold growth, take a closer look at these signs to confirm what's going on.
If you see some mold in your home, how can you tell if it's dangerous? What does mold look like? How do you know if it goes beyond just being unsightly? And what about the smell—does that mean something too? Here are the two main ways to check for mold in your home or business:
1. By sight
The most common way to detect mold is by sight. If the spot in question looked fuzzy, furry, or powdery, there is a good chance it could be mold. Mold can vary in color, so look for green, red, black, or even white.
2. By smell.
You may not recognize the smell of mold because it's not always strong. There are some subtle smells that could indicate mold in your home:
- A musty odor in the air
- An earthy smell like dirt or hay
- A rotten food odor, particularly near areas where there is moisture from a leaky pipe, leaky roof or window, or an appliance with a wet basement-like smell.
Call SERVPRO of Indiana County
If you suspect that your Indiana County home has been contaminated with mold, it is essential that you contact SERVPRO of Indiana County immediately. Our professionals will come to your home and assess the problem. Then come up with a plan to get your home or business back to normal. We will also begin cleaning up the affected area as soon as possible so that you can return to living in a clean environment as soon as possible.
Now that you know what mold looks like, it’s time to take action. If you see any signs of mold in or around your home, then it is important to get it checked out immediately. This is especially true if you have a family with young children or someone who may be sensitive to mold exposure.


 24/7 Emergency Service